

How To Build A Window Seat With Storage
Bound to How-To
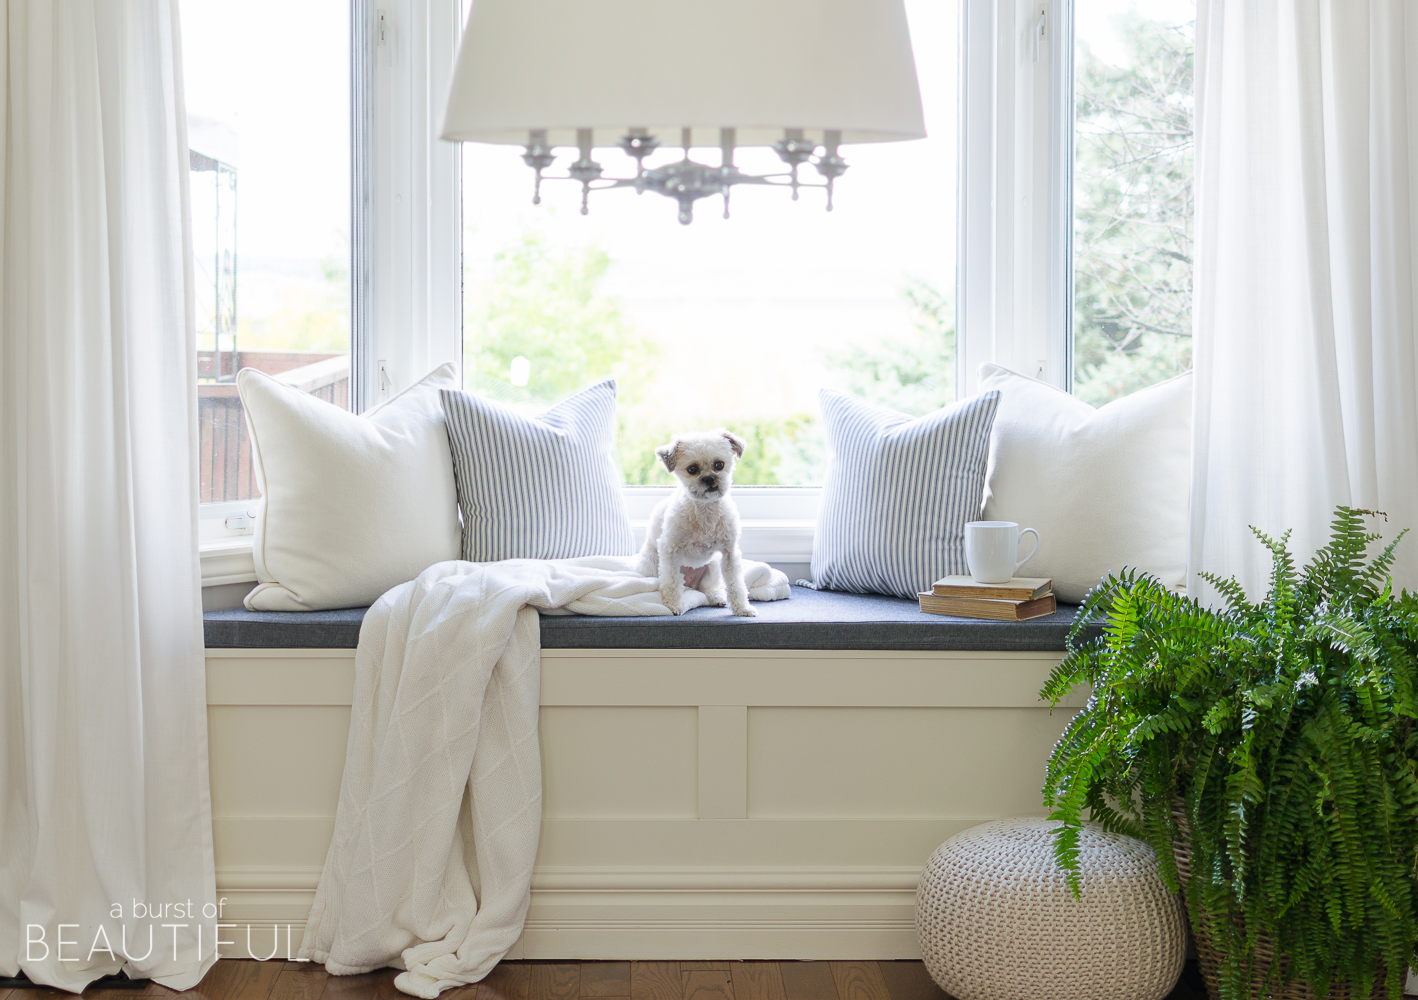
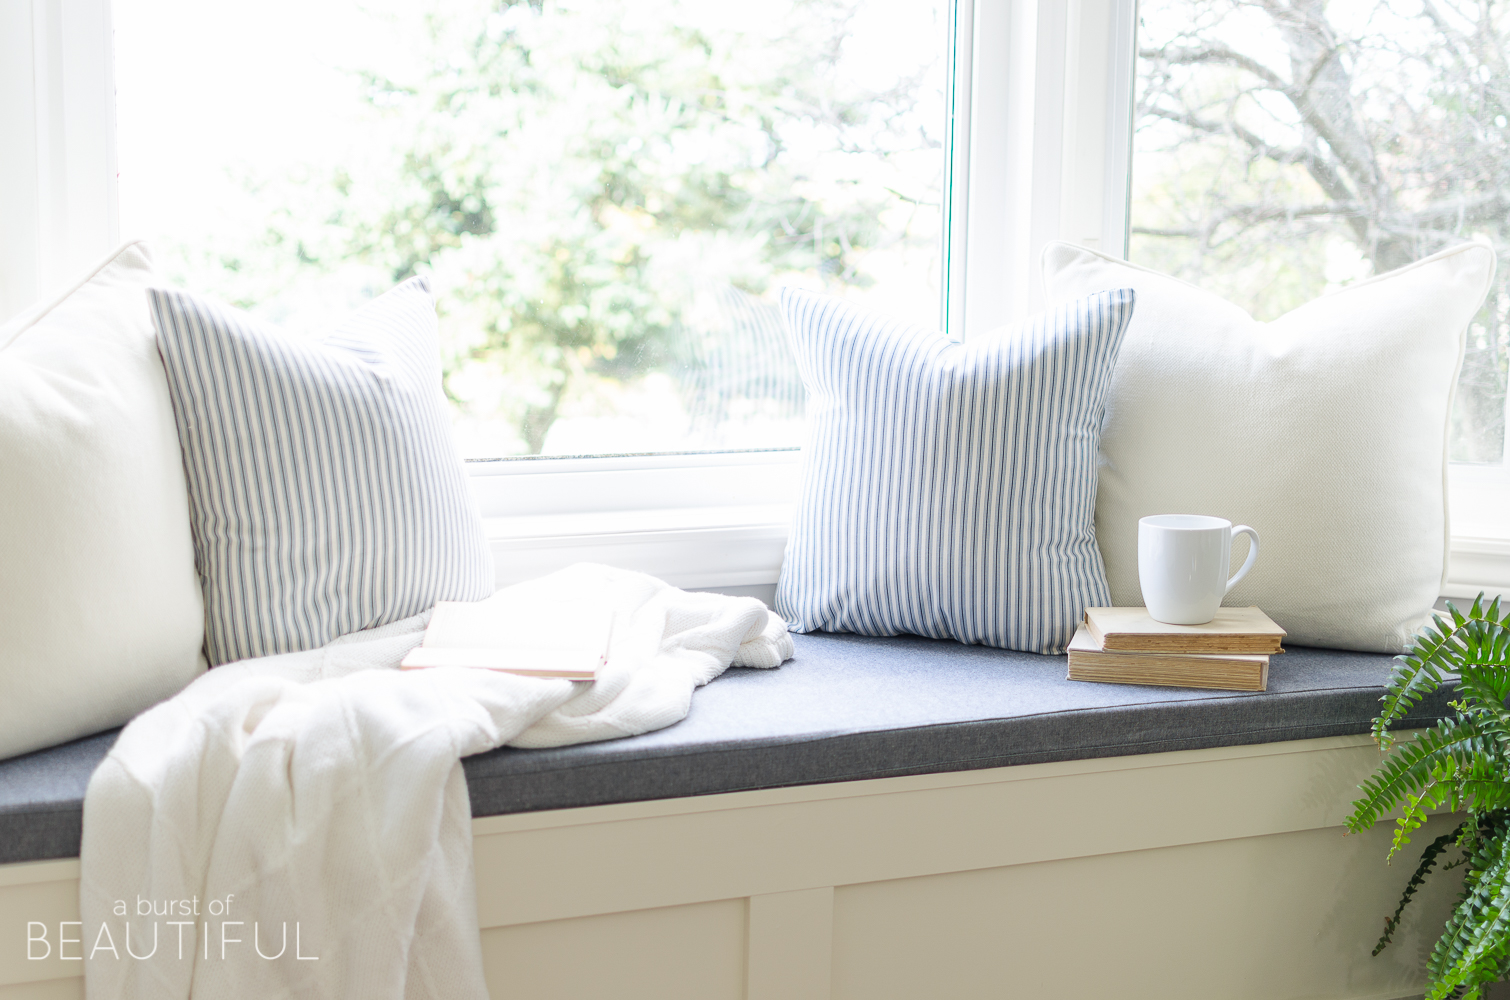
This little window demote is probably ane of our favorite projects we've completed in our house so far. I think back to when information technology was merely useless, empty space and I can't believe we waited this long to utilize it. Information technology truly was the perfect spot to add a window bench and information technology adds such grapheme and charm (not to mention extra storage space) to our dining room. It's the best spot in the firm to curlicue up with a expert book and picket the world get by. And we'll evidence you how to build a window bench with storage in your own bay window below.
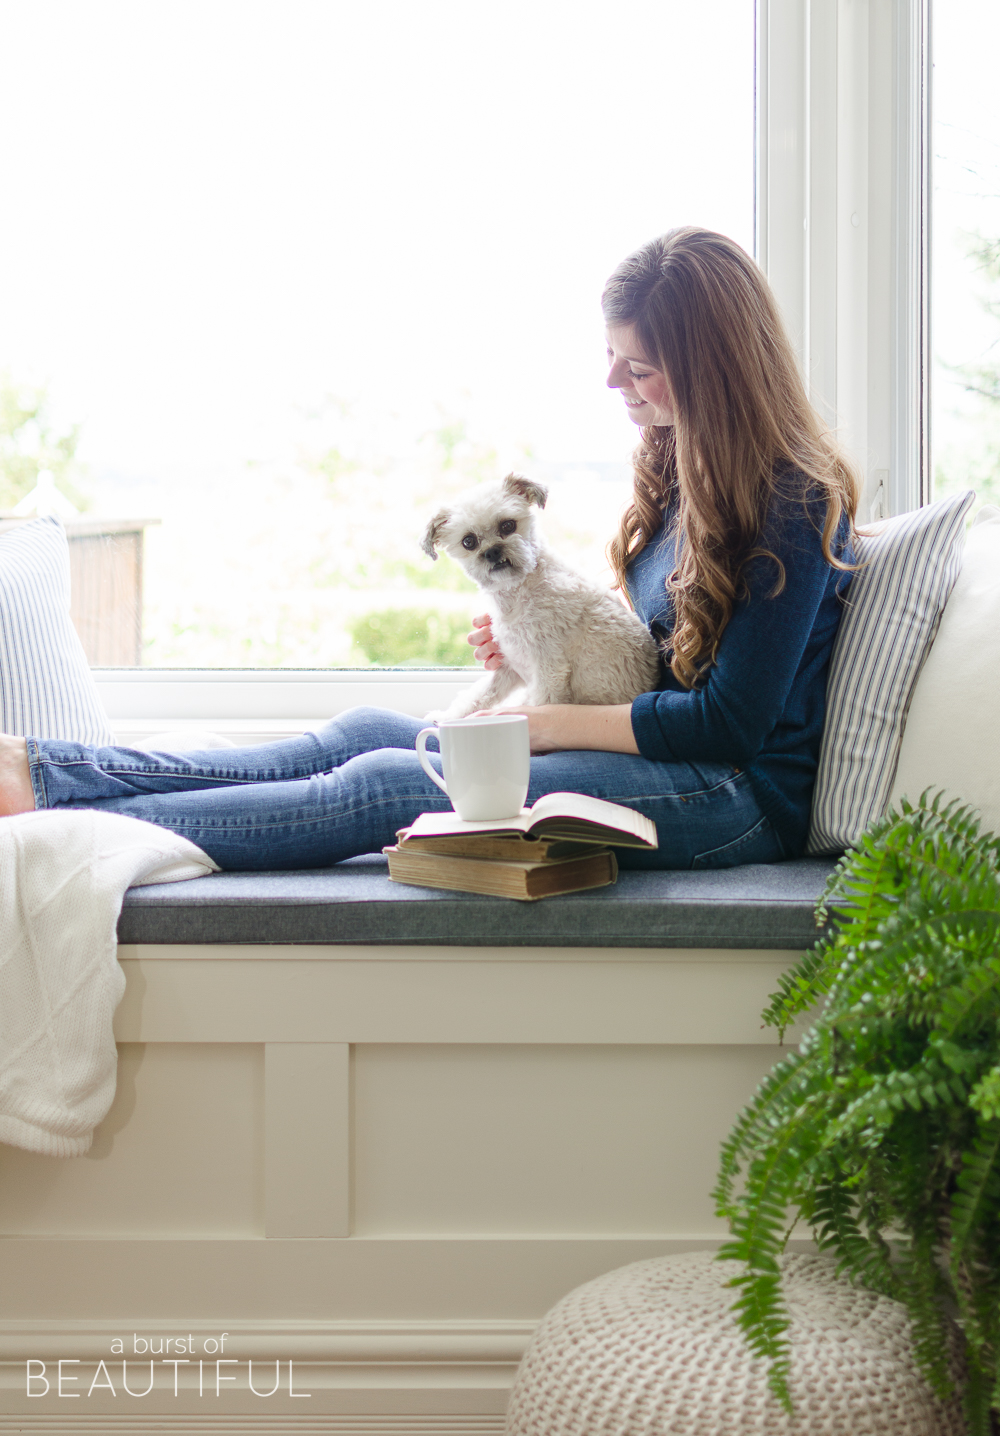
Alicia has always dreamed of having a window demote in our dwelling house where she and Zoe tin can curl upwardly and read stories. Somewhere out of the mode, where Zoe's imagination can run wild as the natural light bounces off the pages of her favorite books. How could I not oblige and turn our bay window into a cozy nook for the two of them?
I don't spend much time with my nose in a book, but it's not because I don't similar a well-written story. I just can't seem to stay awake long plenty to become through a full chapter. Possibly it's because I only accept time to read before bed. But let'due south face information technology, we have a house, a toddler, and three pets to take care of so that's usually the only time we accept to read.
On the other manus, Alicia loves reading. She can go through a book each week (whereas I would take about six months). Zoe loves to read books and has a few favorites, such equally Where the Wild Things Are and I Love Y'all Stinky Face.
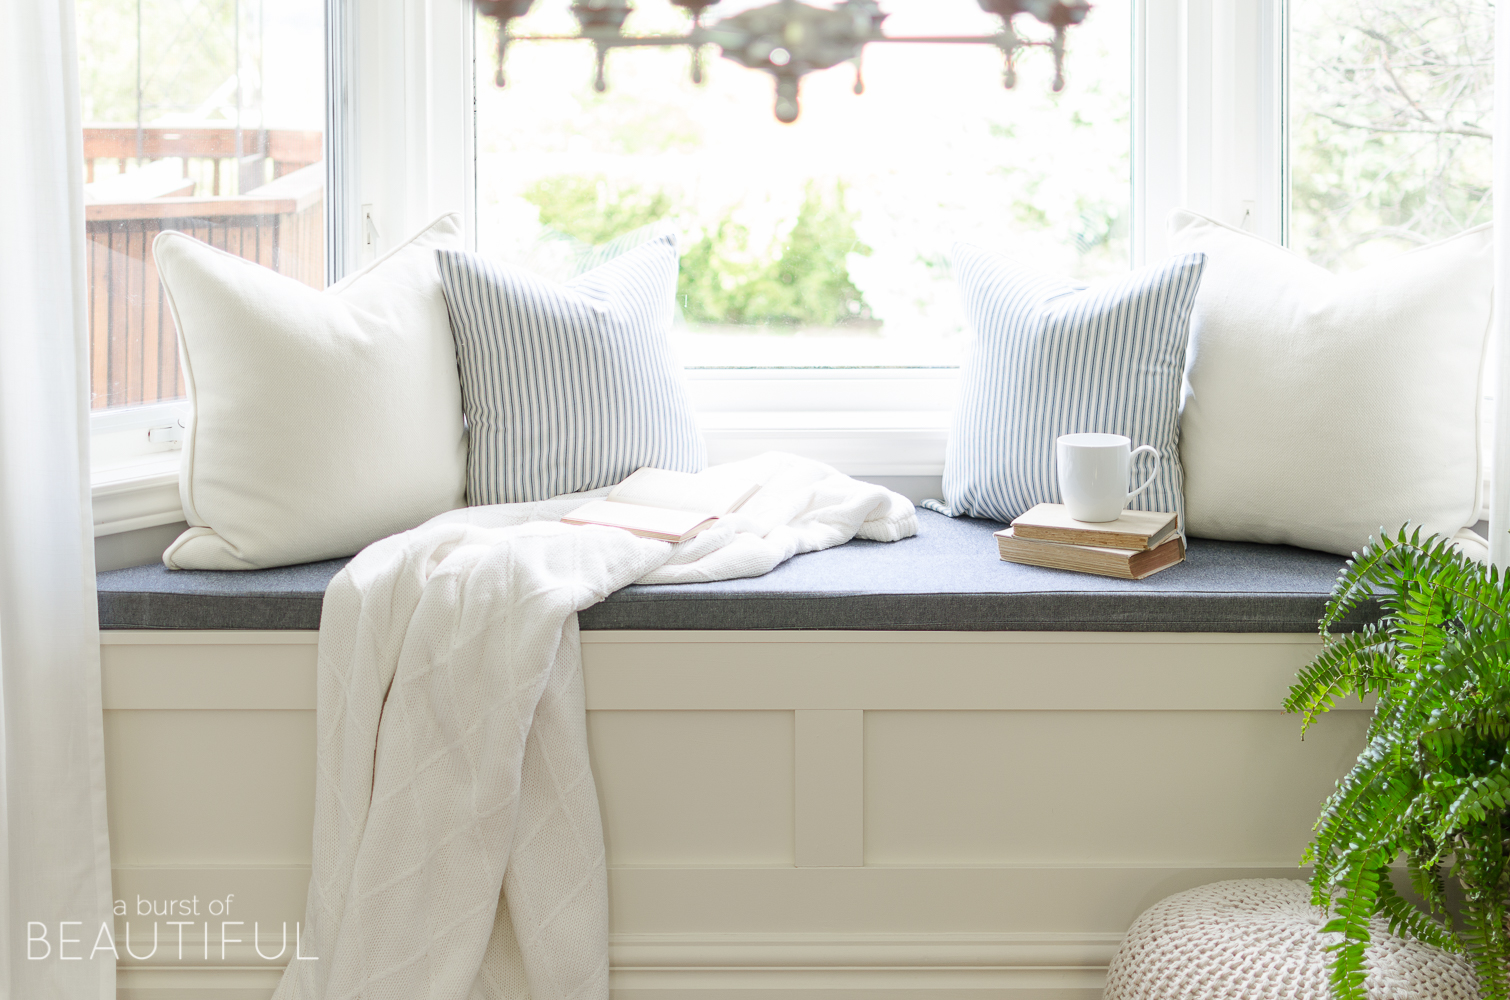
Our window overlooks the bay and faces West so we have gorgeous sunsets that saturate the room at the end of each day. It is definitely God'due south hand that creates the art on that wall. Other than that, it is a pretty ordinary bay window, with not much else going for it. That's when we decided to go far a focal point and useful space in the room.
As I practise with most of our projects, I sabbatum downward to sketch out a program. I ordinarily have a clear vision in my caput when I start a project, but I always need to sell information technology to Alicia who likes to see an prototype earlier I turn something into reality. It also helps me figure out what materials I demand and attempt to avoid any oversights that could happen due to poor planning.
Our friends at The Home Depot loved the concept and wanted to work with us on this blueprint. Information technology'south a weekend projection that anyone with intermediate experience and the correct tools can tackle.
At that place are two ways you tin build this bench: the piece of cake mode, or the harder mode. Aren't those always the options to choose from? Why tin can't information technology always be the easy fashion? I digress. The easy option is to build a sturdy frame and and so cut a piece of plywood to size, add together trim, fill holes, paint and yous're done. Like shooting fish in a barrel, correct?

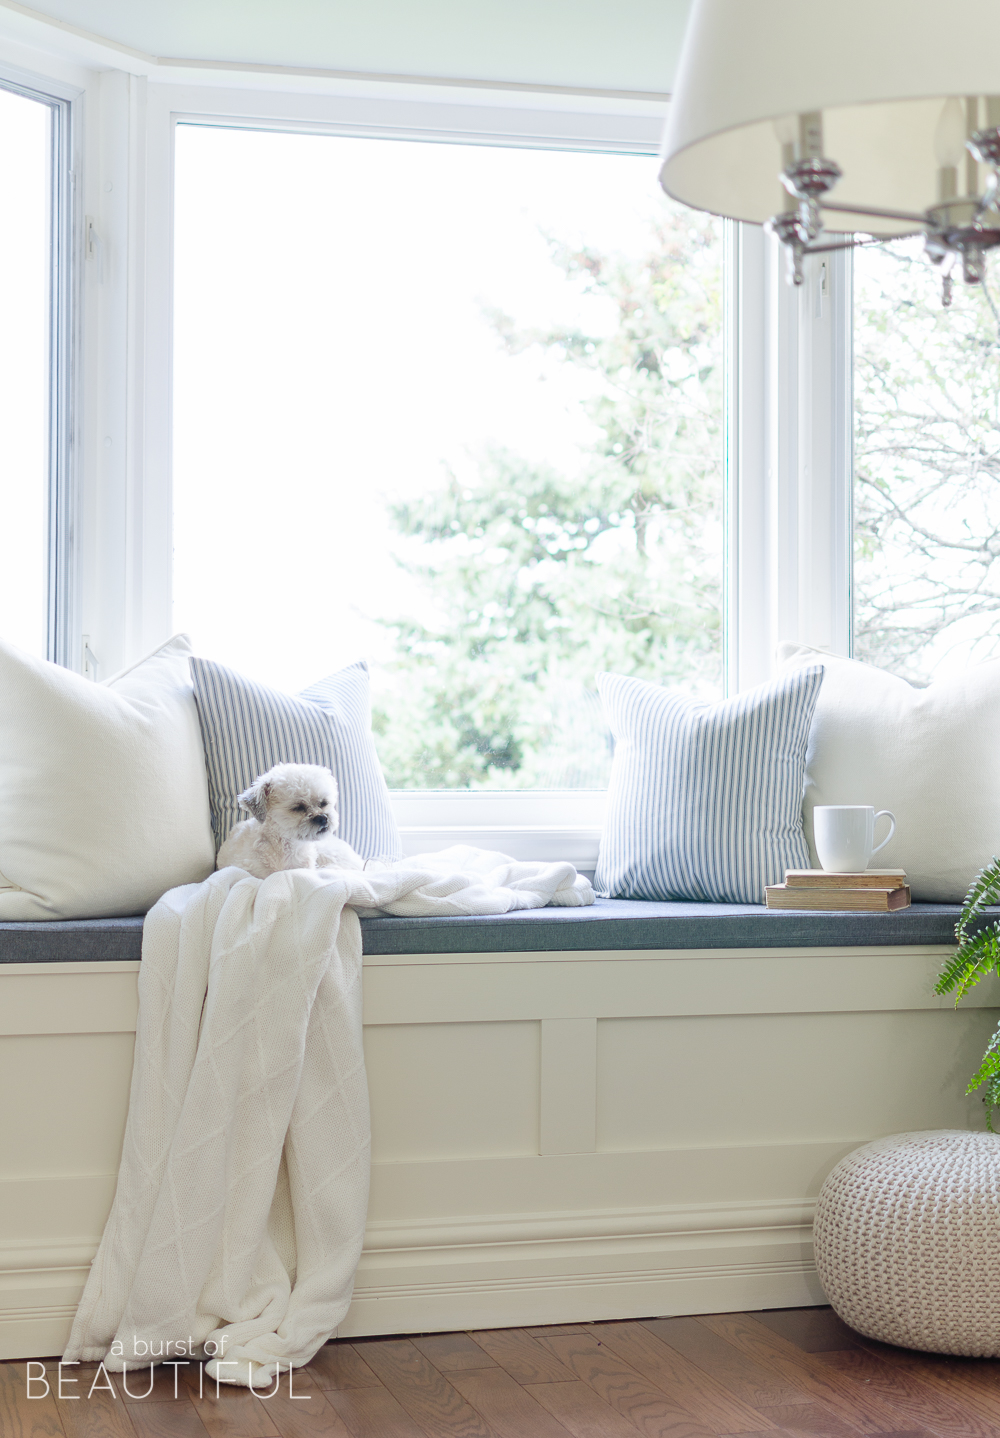
The harder option is to build a bench with storage. Now, if your bay window is square instead of angled, you'll have a much easier fourth dimension. Ours is angled and if I had made the top one big piece, it wouldn't have lifted upward due to the angles of the window. So I had to come upward with a design where only the eye portion of the bench opened up. I besides wanted the lid to exist hidden then that it would look seamless from the forepart in one case a cushion was placed on acme, and information technology would too go on our picayune one from being able to open it. This required a lilliputian more thought and proper pattern planning.
I had considered creating a shelf-similar base inside the bench so that when it was open, it would await completely finished. However, I realized that this would reduce the amount of storage infinite inside the bench. This won't exist something we need to access every day so it doesn't need to look 'pretty'.
Materials
- ii″ x 4″ x 8′ SPF Dimensional Lumber (for framing)
- 1″ x 4″ 10 8′ MDF (for the front edge, back edge and panel trim)
- 1/4″ten two′ x four′ Birch Plywood Handy Console (nosotros used two for forepart panels)
- MDF Bullnosed White Shelving five/8 Inch x 15-1/4 Inch ten 96 Inch (for the top)
- 24 Inch 10 1 1/iv″ Nickel Continuous Hinge (Piano Hinge)
- Primed Finger-Jointed Pino Cove Trim (for the concluding step, #xix, if required)
- 2 1/2″ Kreg Pocket Hole Screws
- two 1/2″ woods screws
- ii ane/two″ construction screws
- Forest mucilage
- Wood filler
- 1.25″ Brad Nails
- White Caulking
Tools
- Kreg Jig
- Mitre saw
- Circular saw
- Cordless Drill
- Brad Nailer
- Caulking Gun
Instructions
- First and foremost, habiliment proper personal safety equipment when using any power tools.
- Remove any baseboard from the bay window.
- Determine the top of your bench. If you are adding a absorber y'all'll want to reduce the frame acme by 2″ plus the height of your seat board. Nosotros settled on a finished height of twenty″ including the cushion. Therefore, the math to figure out the height of the frame is 20″ – 5/8″ – two″ = 17 3/8″.
- Mark the height of the frame at several points along the walls. So use a level to depict a line effectually all three walls of the bay window. You may non hit the marks you've drawn, but it could be that your flooring isn't level. That's ok because the goal is to make the height as level as possible.
- Using a stud finder, locate all of the studs in the bay window and marker them to a higher place the line you've just fatigued.
- Measure and cut a piece for the center wall with the proper angles to friction match the wall on either stop. For instance, if your wall angle measures 135°, then each end should be cut at 45° (total of 180°). Spiral into the studs using 2.5″ screws.
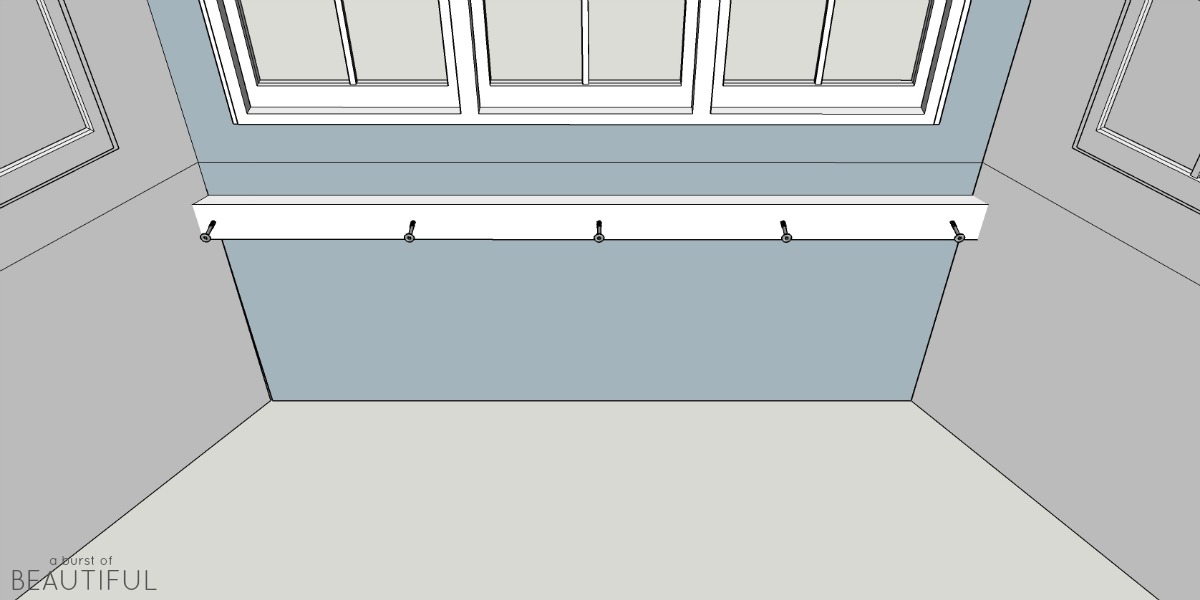
- And then measure the length from the piece you just installed to the outside edge of the wall. Deduct ii″ for the depth front bridge piece, 1/4″ for the plywood face up and 5/eight″ for the trim you will be attaching later. Cut each end using the same angle you lot used in the previous step, only they will both be cut in the same management as shown in the diagram beneath.
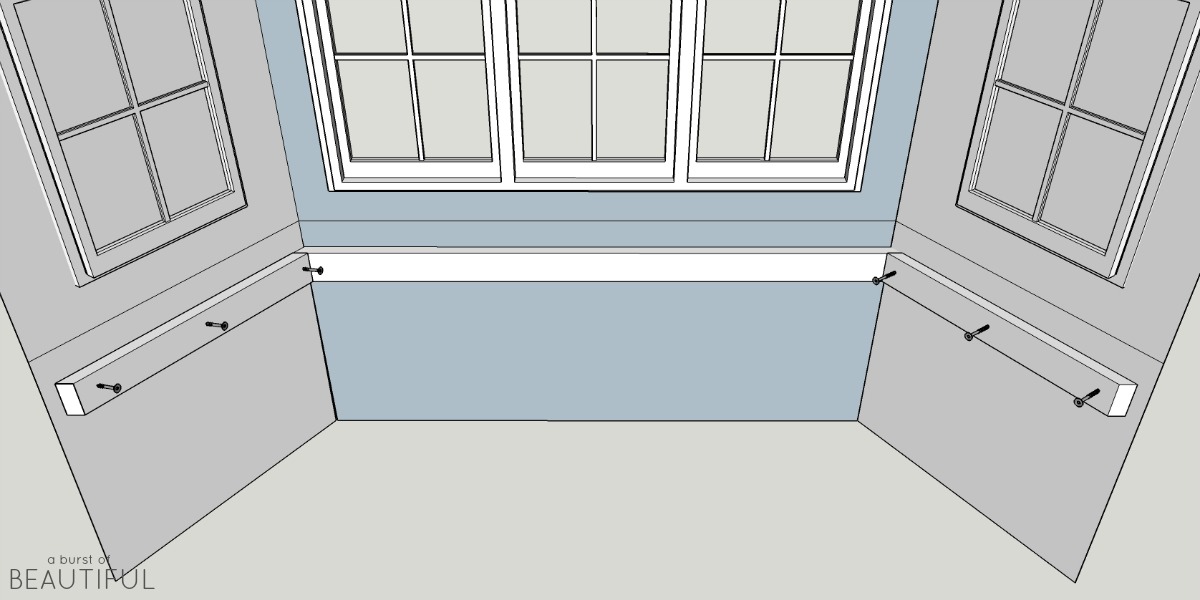
- Measure out and cutting 2 2″ x 4″s to fit in the corners for added support at the back. Screw into studs using ii.5″ screws.
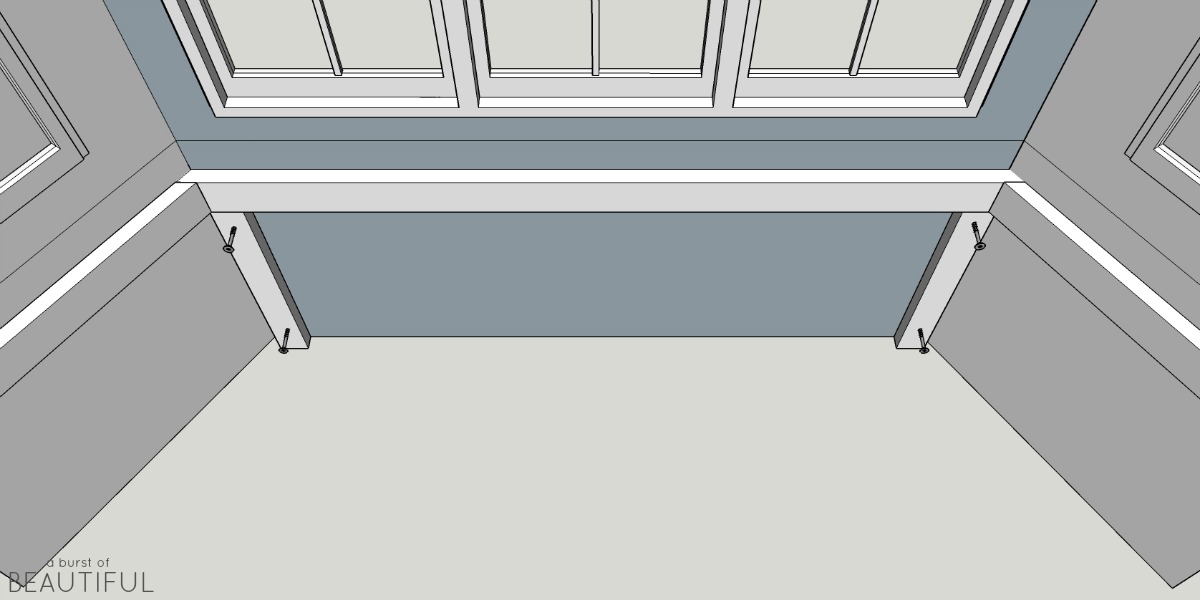
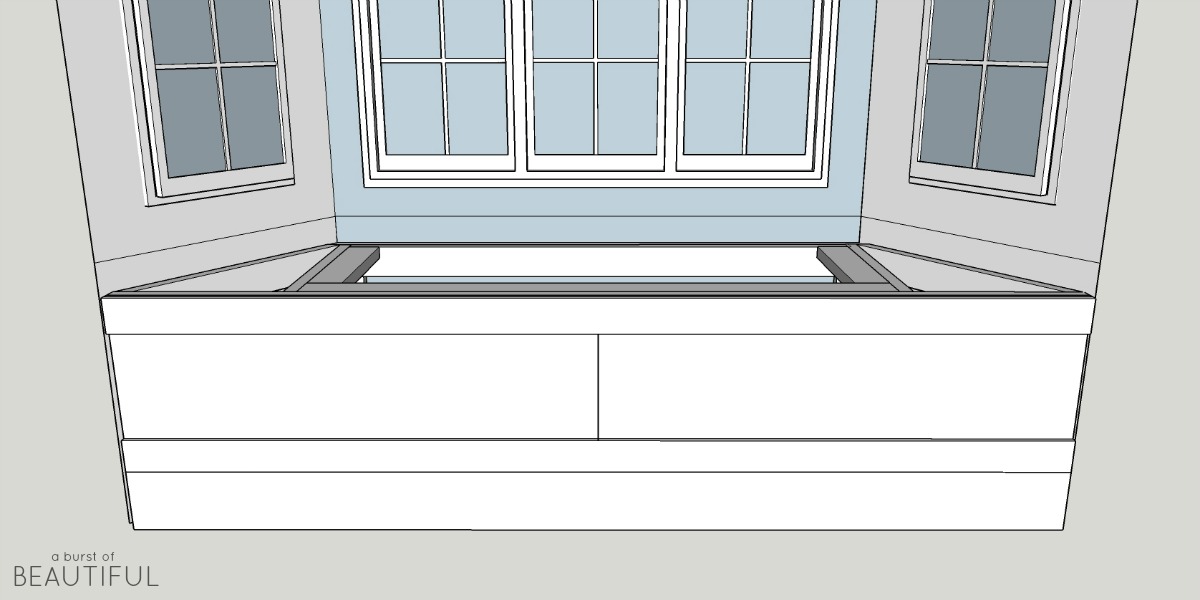
- Mensurate from one end to the other and cut a 2″ ten iv″ to length for the front bridge. You can add together angled ends to match the wall, however, I just left ours at 90°. Attach to the side supports using 2.5″ screws.

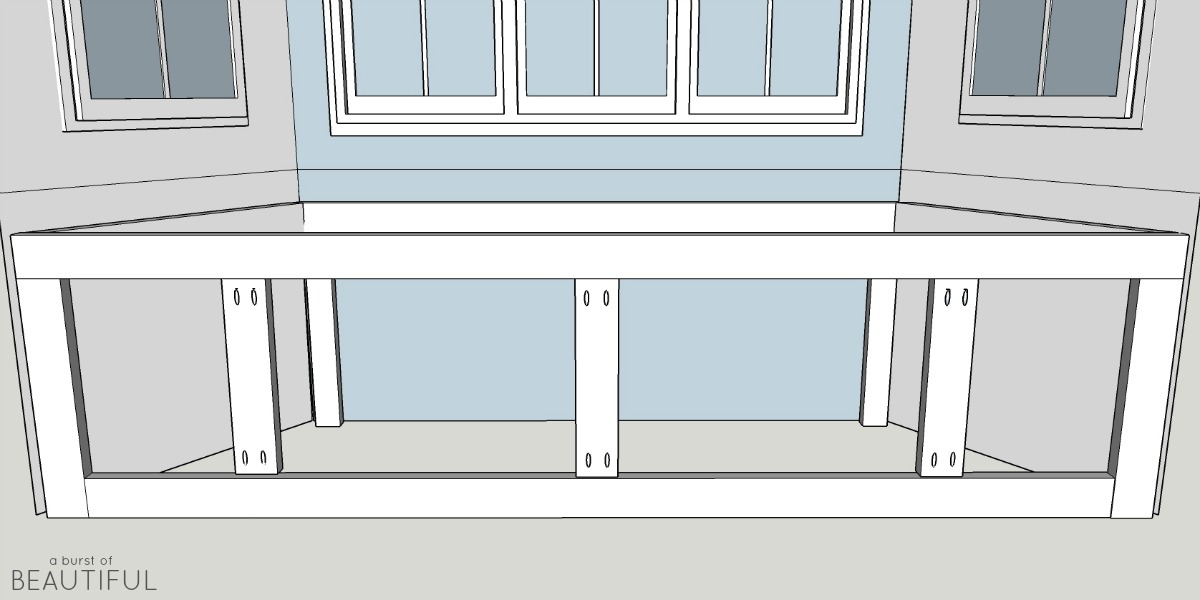
- Measure out from the bottom of each side of the forepart span to the flooring and cut two two″ ten 4″s to these measurements. Drill two pocket holes on 1 cease of each. If you don't have a Kreg Pocket Hole Arrangement from The Abode Depot (which nosotros couldn't live without at present that we have one) you can simply toenail the screws instead of using pocket holes. Secure to the lesser of the front end span using 2.five″ pocket hole screws. Then, mensurate the length along the floor between the two cease pieces. Cut a 2″ x 4″ to length and drill two pocket holes on each end. Secure to the end pieces using ii.5″ hole screws.

- Find and mark the mid-point of the forepart spans. Mensurate the distance between the pinnacle and bottom and cut a 2″ x 4″ to that size. Drill two pocket holes on each end of the board. Secure in place with 2.5″ pocket hole screws. Then find and mark the mid-point betwixt the center piece y'all just attached and each side of the bench. Measure out, cut, drill and adhere these pieces the same way you did the center piece.
- Measure from the back corners to the pinnacle front bridge. Cut two pieces of two″ ten 4″ to fit and drill 2 pocket holes on 1 end. Insert and square them up as shown beneath and use two.five″ pocket hole screws to secure the back and drill through the front span with two.5″ construction screws to secure in place.
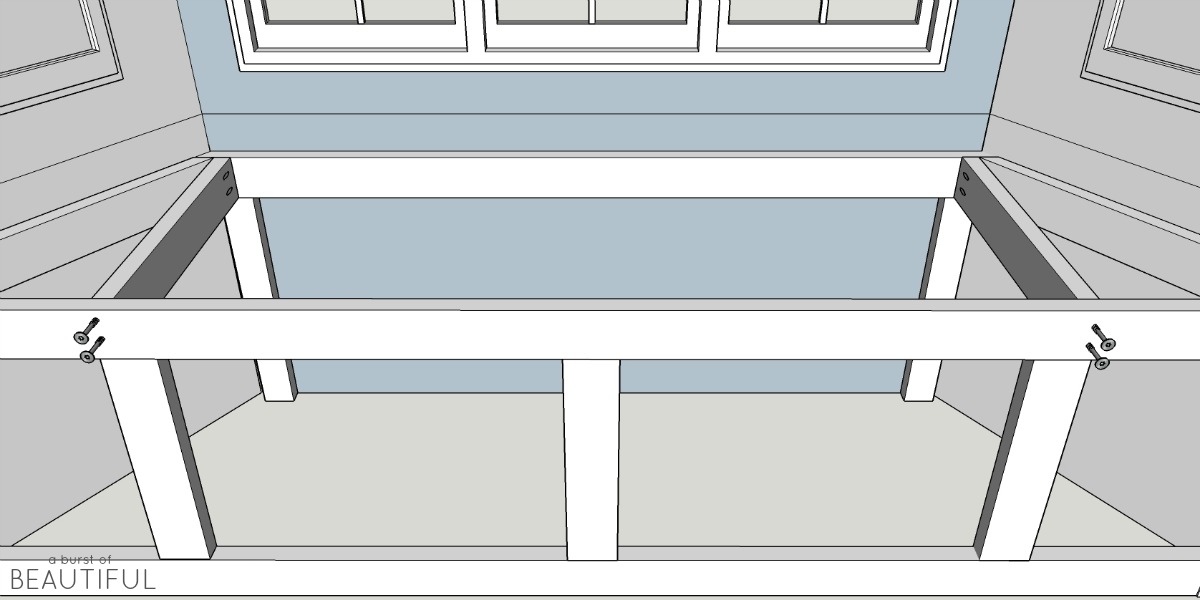
- Measure out betwixt the two pieces you just installed. Cutting a 2″ x 4″ to size and secure to the back of the frame with 2.5″ construction screws.

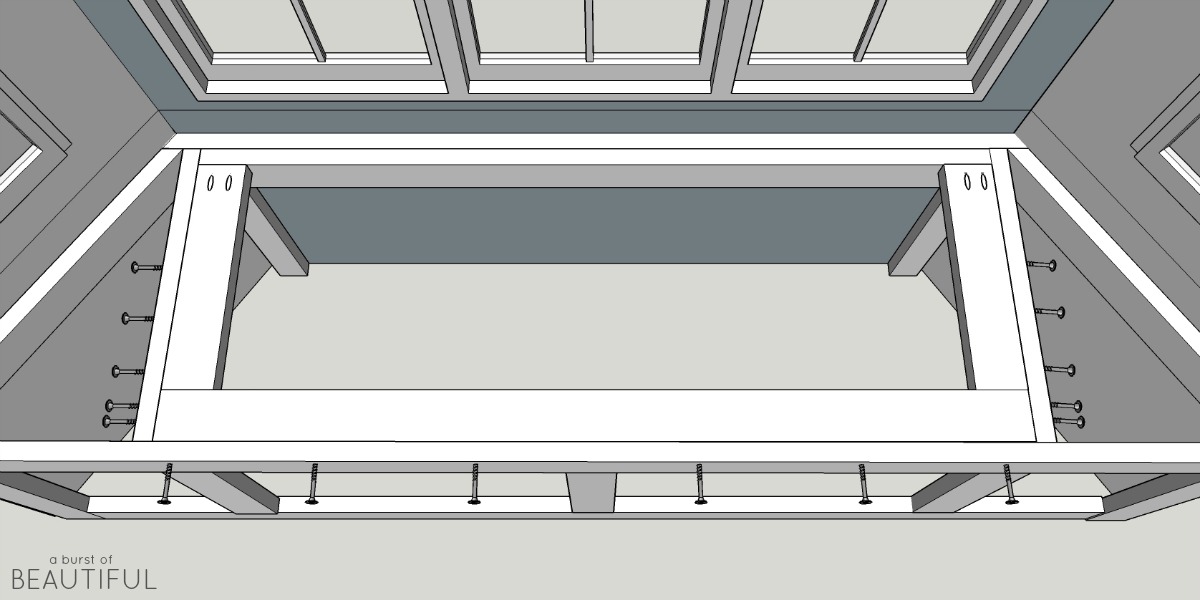
- Cutting a 2″ x four″ to fit the front area between the side supports. If your demote is foursquare it will likely exist the aforementioned length equally the board you installed in the terminal step, but measure again just to make sure. Secure information technology with the 2″ side against the forepart span with 2.5″ constructions screws. Then measure out for the pieces that run forepart to back on each side. Drill pocket holes on one terminate of each lath and spiral in identify using four pocket hole screws and three construction screws forth each side as per the diagram below.
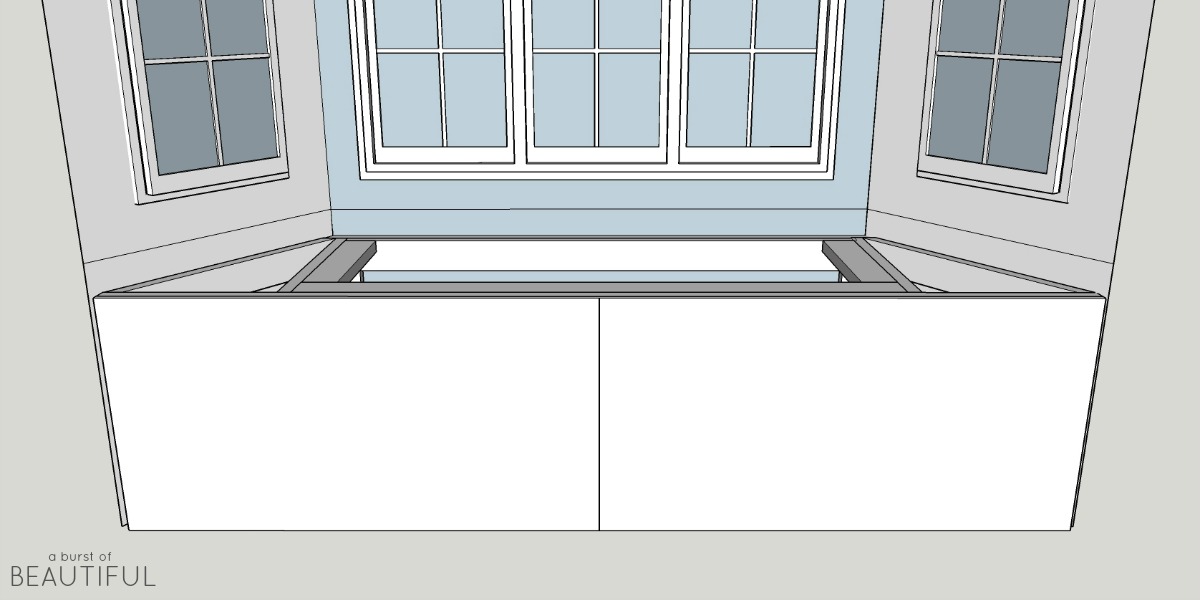
- Cutting the 24″ x 48″ ten 1/4″ plywood sheets down to size. We used ii panels and joined them in the center where they will exist covered with trim, but you can buy a single iv′ x 8′ x i/4″ sheet and cut it downwards to fit if you adopt (24″ x 48″ sheets fit better in a car). Using an air compressor and brad nailer, secure the panels to the front frame using 1 1/4″ brad nails. Nail in places that will be covered past the concluding trim and then that yous don't take to fill every bit many holes.
- If y'all are going to attach baseboard trim to the bottom of your bench, you lot will demand to bump it out by 5/eight″. Cutting a piece of scrap 5/8″ plywood to the superlative and length of your baseboard and attach them to each other with brad nails and glue. Then add a one″ x four″ MDF lath on top of information technology, and another one at the tiptop of the bench using glue and brad nailer with one one/iv″ nails.
- Add together the baseboard back to the lesser, and and then cutting iii 1″ 10 4″ boards for each side and the middle to cover the seam of the plywood. Utilise brad nails and to secure them to the forepart. Notation: If your bench is really broad, you can as well dissever the two boxes to brand a total of iv. Simply cutting two more 1″ ten iv″southward downward to size and center them in each of the boxes.

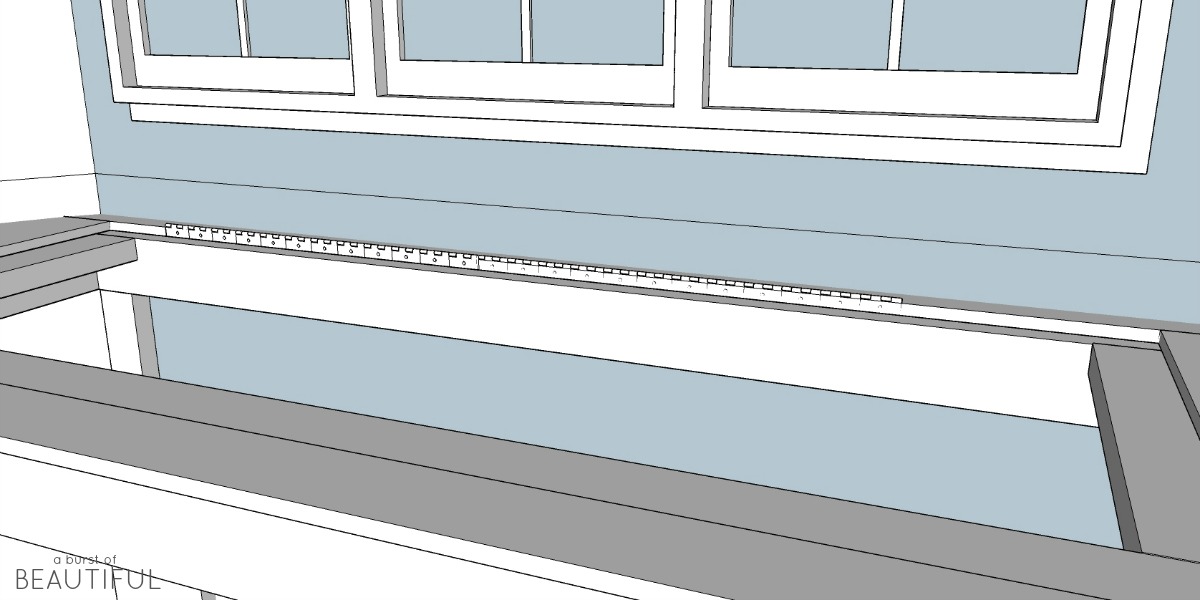
- There are two ways to consummate this next step. If you practise not want to use the bench for storage, you lot can but cut a unmarried slice of 5/8″ plywood to fit the seating area and add a slice of decorative 5/viii″ trim to the face edge to stop the wait. Or, you can add hidden storage as we did. This part will be a bit of a jigsaw puzzle. The way we did it was to outset attach the forepart lip slice to ensure that the front was foursquare. This front lip fabricated it possible to hibernate the seams of the lid. It's a 1″ x 4″ MPF piece that we fabricated overhang the front by 1/two″. We added angles on the edge of this piece to match the angle of the wall to give it more than of a finished look. Secure information technology with glue and brad nails. Nosotros and so cutting the sides of the seat out of the MDF shelf board. There are a couple of ways to do this. You could trace a template on a big slice of newspaper and and then transfer it to the woods. The other method is to measure the length from the wall to where the side supports are located at the front end edge (along the inside of the front lip piece). Y'all don't desire to comprehend all of the side supports, simply about half of it. The other one-half will back up the chapeau when information technology is closed. You can also use an angle finder (or if you don't take one, attach two two″ x 4″s at one end with one spiral so that you can open it up similar a large angle finder). Place one board forth the front lip piece, and rotate the other to match the angle of the wall. Hold the bending of the 2″ x 4″s and transfer to your woods. Cut it out carefully using a round saw. Cut a piece of plywood or MDF using a jigsaw for the back piece that runs against the wall. The goal is to create an absolute square hole for the lid to fit in. If your back wall isn't straight or the top is non exactly square, and then this is where you volition brand adjustments. You lot'll besides want to make sure that some of the supporting two″ x 4″ will even so be visible so it tin shoulder some of the seat weight.

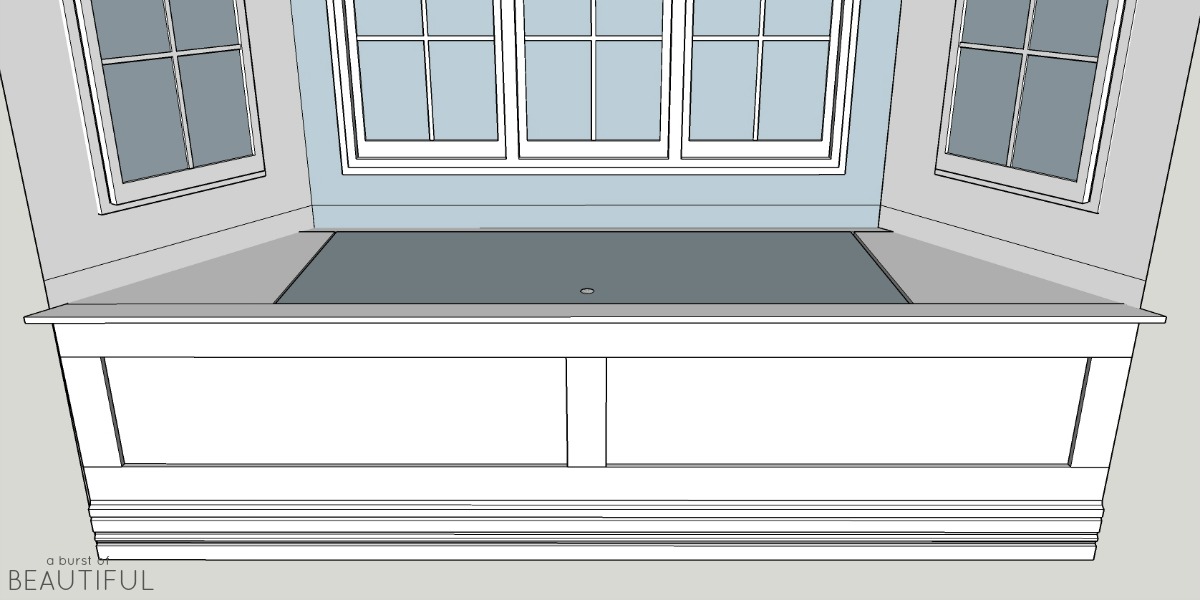
- Install the pianoforte hinge to the front of the dorsum 5/8″ piece you just installed with the hinge facing upwardly. Be careful to attach it in the correct orientation so that your chapeau swings upward. Measure the opening for the lid. Reduce each side by 1/eight″ to requite it some clearance. Cut the lid out of your shelf lath or plywood. On the face side of the lid, drill a 7/eight″ pigsty in the middle about 2″ from the front edge. This volition be how y'all will lift the storage lid. Make sure you do this before you test the fit of the lid, or else you'll accept a hard time removing information technology once again. In one case you've tested information technology for fit y'all'll want to have someone aid you hold the chapeau upward on an bending so that you can attach the hinge to the back edge of the lid.
- Caulk effectually all seams and edges, except for the lid. Make full the brad boom holes with forest filler. Let to dry out and then pigment with your trim color. If you have larger than normal gaps around the wall, you tin use cover trim similar we did to cover the spaces and give it a more finished await.
- Detect someone to make you a cushion! We didn't even attempt this on our own. We had a local upholsterer make the states one for under $200! These can become quite expensive then brand sure you store around.
Well, that was a lot of explaining! If you decide to tackle this project in your business firm and y'all have any questions, we would be happy to try and assistance you out! Just send united states your questions and comments below. And we'd likewise love to see how yours turns out!
Nick

How To Build A Window Seat With Storage,
Source: https://www.nickandalicia.com/2016/10/diy-window-bench-storage.html/
Posted by: mcknightbeficest1967.blogspot.com
0 Response to "How To Build A Window Seat With Storage"
Post a Comment